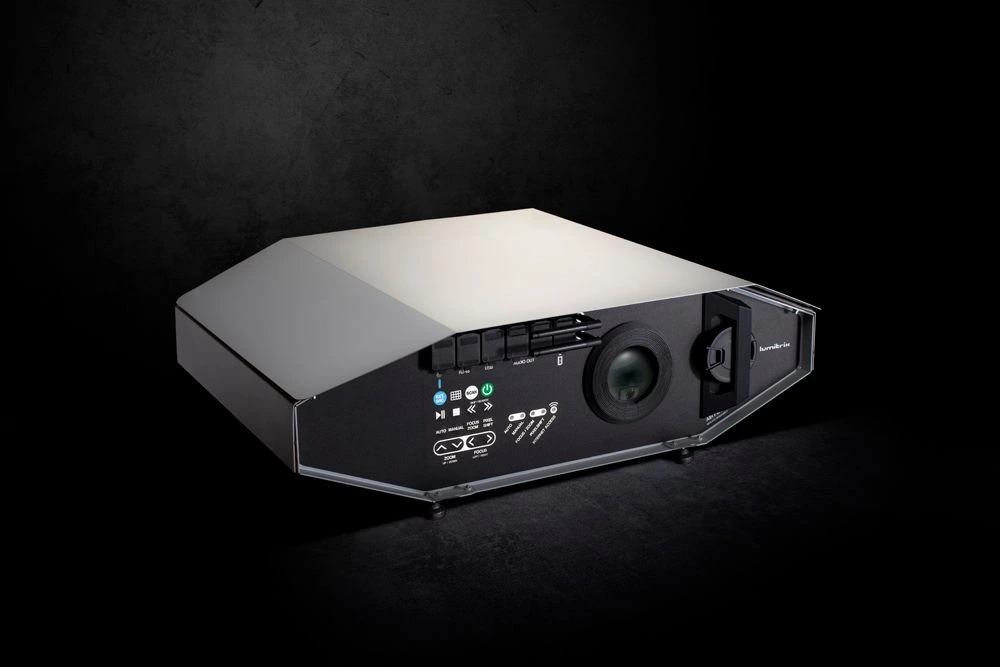

Choosing a projector for projection mapping is not simply a matter of buying the brightest or highest-resolution model you can afford. The right choice depends on the surface you want to map, the distance available for the projector, ambient light, image size, and how precisely you need to control the image.
There is also an important misconception to clear up: you do not necessarily need a projector specifically marketed as a “projection mapping projector.” Many conventional projectors can work for mapping when their optical and performance characteristics fit the project.
What Is a Projection Mapping Projector?
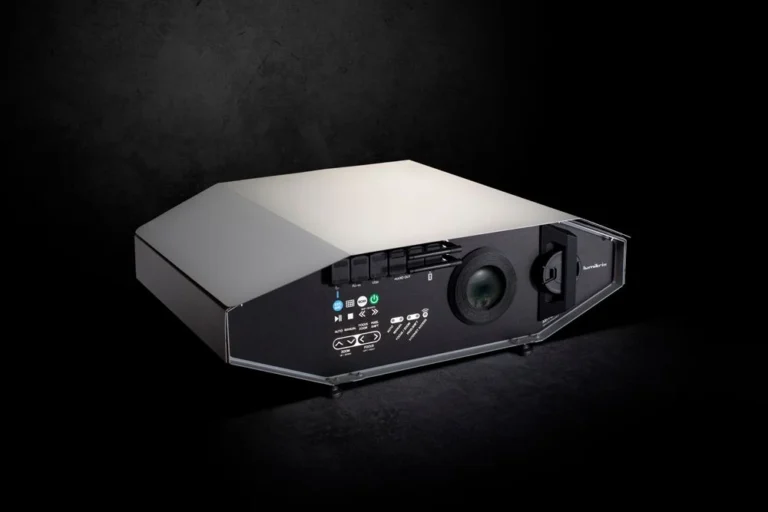
A projection mapping projector is a projector used to display visual content on physical surfaces such as walls, buildings, stage sets, objects, or other 2D and 3D structures. Mapping software then shapes and positions the content so it follows the geometry of that surface.
The projector itself does not create the mapping. It provides the image, while the combination of placement, optics, content, and mapping software makes the image fit the physical object.
How It Differs From Regular Projection
Regular projection usually targets a flat screen or wall. Projection mapping is more flexible: the surface can contain corners, curves, depth, architectural details, or irregular shapes.
That changes the projector requirements. You need enough brightness to illuminate the surface, enough resolution for the level of detail you want, and an optical setup that can cover the surface from the available mounting position.
For a simple flat wall, a normal home or business projector may be sufficient. A large building or complex 3D installation can require much more powerful hardware and multiple projectors.
Can You Use a Normal Projector?
Yes. A conventional projector can be used for projection mapping as long as it can produce the required image size, brightness, resolution, and coverage from the available position.
For a small indoor project in a dark room, a consumer or business projector may be perfectly practical. Larger outdoor or professional installations impose much more demanding requirements.
The important question is therefore not “Is this a mapping projector?” but:
Can this projector cover my surface with enough brightness and image quality from where I need to place it?
Start With Your Projection Surface and Space
Before comparing projector specifications, measure the environment where the projection will happen. Your physical setup determines which projector specifications matter.
Measure the Projection Surface
Start with the width and height of the area you want to cover. For an irregular object, measure the overall area that needs projection and note the important sections that the content must follow.
Also consider the surface’s shape. A flat wall is relatively simple. A building facade, stage prop, vehicle, or 3D object introduces depth and angles that affect projector placement and mapping accuracy.
The larger the required image, the more carefully you need to consider both brightness and throw distance.
Consider Surface Material and Ambient Light
Surface color and material affect how easily the projected image can be seen. A light, matte surface generally provides a more useful projection surface than a very dark or highly reflective one.
Ambient light matters just as much. A projector that looks bright in a dark room may produce a weak-looking image when the same light output is spread across a large surface in a brighter environment. Current projection-mapping guidance consistently treats surface area and ambient light as key variables rather than relying on one universal brightness number.
For outdoor mapping, this is particularly important. Projecting after dark is very different from trying to compete with daylight, and the required hardware can change dramatically with the conditions.
Expand Your Knowledge: Computer Screen Shadow Problem
Calculate Throw Distance and Throw Ratio
Once you know the projection size and the available installation space, you can determine what type of projector lens you need.
What Is Throw Ratio?
Throw ratio describes the relationship between the distance from the projector to the surface and the width of the projected image.
The basic formula is:
Throw Ratio = Throw Distance ÷ Image Width
For example, if a projector is 4 meters from a surface and needs to produce a 3-meter-wide image:
4 ÷ 3 = 1.33
So you would look for a projector and lens capable of roughly a 1.33:1 throw ratio.
This calculation is important because two projectors with similar brightness and resolution can have completely different placement requirements.
Always check the manufacturer’s specified throw-ratio range or use its projection calculator before buying or renting a projector.
Short-Throw vs. Standard-Throw Projectors
Short-throw projectors can produce a large image from a relatively short distance, making them useful when you have limited space between the projector and the surface.
Standard-throw projectors provide more distance between the projector and the projection surface and are common in rooms, stages, and medium-size installations.
Neither is automatically better for projection mapping. The right choice is the one whose lens range matches your actual installation position.
For professional projects, interchangeable lenses can provide considerably more flexibility when the available distance varies from one installation to another.
How to Choose the Right Projector Specifications
Once the physical setup is understood, you can compare the specifications that will determine how well the projector performs.
Brightness and Lumens
Brightness is one of the most important projector specifications for mapping, but there is no single lumen number that works for every project.
Your brightness requirement depends on the projection area, ambient light, surface characteristics, and viewing conditions. A small projection in a dark room can work with significantly less light than a large facade in a bright environment.
When comparing projectors, pay attention to standardized brightness measurements such as ANSI lumens rather than vague marketplace claims. Manufacturer specifications can also use different brightness modes, so the headline number should not be treated as the complete picture. Epson, for example, distinguishes white and color brightness measurements and identifies the measurement standards used for its projectors.
If the image is too dim, you can sometimes improve the result by reducing the projection area, controlling ambient light, changing the surface, or using additional projectors. You do not always need to solve a brightness problem by buying a dramatically more powerful projector.
1080p vs. 4K
Higher resolution gives you more pixels to work with, but 4K is not automatically necessary for every mapping project.
A 1080p projector can be suitable for smaller surfaces, moderate viewing distances, and content that does not require extremely fine detail. Higher resolution becomes more useful as the projected image becomes larger or the audience views it from closer range.
The important relationship is between resolution, physical image size, viewing distance, and content detail.
For example, a large building projected for an audience standing far away does not necessarily benefit from 4K in the same way as a smaller installation viewed from close range. Choose the resolution based on what the audience will actually see, not just the specification that looks better on a product page.
Lens Shift, Keystone, and Image Warping
These features solve different problems and should not be treated as interchangeable.
Lens shift moves the projected image optically without requiring you to move the projector itself. This can make installation easier when the projector cannot sit directly in the ideal position.
Keystone correction digitally adjusts the projected image when the projector is positioned at an angle. It can be useful for minor corrections, but heavy correction is not a substitute for proper projector placement.
Image warping and masking are handled through mapping software to make content follow the actual contours of an object or structure.
For mapping, it is better to get the physical placement and lens configuration as close as possible before relying heavily on digital correction.
Laser, LED, or Lamp?
The light source affects maintenance, operating life, startup behavior, and the practical suitability of the projector for repeated installations.
Laser projectors are attractive for frequent or long-running work because they generally offer long operating life and consistent output without the routine lamp replacement associated with traditional lamp projectors.
Lamp projectors can still make sense when upfront equipment cost matters or when the projector will only be used occasionally.
LED projectors are often compact and efficient, but many models are designed for smaller applications rather than high-output architectural projection.
The light source should therefore be considered alongside brightness, installation requirements, and how often the equipment will be used.
Connectivity and Installation Flexibility
Check the inputs and signal requirements before purchasing. HDMI may be enough for a simple setup, while larger or more complex systems can involve DisplayPort, network connectivity, media servers, or other signal-management equipment.
Input latency matters when the mapping is interactive or tied to real-time content. For a prerecorded video, latency is usually less important than it would be for an interactive installation.
Installation flexibility also matters. Features such as optical zoom, lens shift, mounting options, projector orientation support, and interchangeable lenses can make a major difference when the physical installation cannot follow a standard layout. Current professional models demonstrate how much lens shift and lens options can vary between projectors.
What Type of Projector Fits Your Project?
There is no single projector specification that suits every type of projection mapping. Start with the scale and environment of the project.
Small Indoor and DIY Projects
For small objects, walls, artwork, or indoor experiments, a conventional projector can be enough.
A controlled, dark room reduces the brightness requirement, while a modest projection area makes resolution and throw distance easier to manage. For this type of project, ease of setup and accurate placement may matter more than extreme brightness.
Outdoor and Event Mapping
Outdoor mapping generally requires more planning because the projection surface is larger and environmental light is harder to control.
You need to consider the distance between the projector and the surface, the size of the image, the brightness available at the surface, weather and mounting conditions, and where the audience will be.
For house or event mapping after dark, a short-throw model can be useful when space is tight, but the actual throw ratio should still be calculated from the installation measurements. Larger facades can require substantially more powerful projectors or multiple units.
Large-Scale and Professional Mapping
Architectural and professional installations often require higher-output projectors, flexible lenses, precise mounting, and more sophisticated signal management.
Large projects may also use multiple projectors to cover the entire surface without compromising brightness or image coverage. HeavyM’s current guidance notes that large-scale projects commonly combine multiple high-performance projectors, while professional projector manufacturers provide dedicated multi-projection and edge-blending features.
One Projector or Multiple Projectors?
One projector is usually the simplest option when it can cover the entire surface at the required brightness and resolution.
Multiple projectors become useful when the surface is too large for one image, when one projector cannot provide enough coverage, or when the installation needs a wider or more detailed image.
With multiple projectors, the images must be aligned carefully. Overlapping image areas can then be combined using edge blending so the audience sees one continuous projection rather than obvious boundaries between projectors.
Do not add projectors simply because more hardware sounds better. Each additional unit increases alignment, synchronization, cabling, and calibration requirements.
Expand Your Knowledge: What Is Cloud Connected Audio?
How to Set Up a Projection Mapping Projector
After choosing the hardware, the setup process should follow the same physical logic used to select the projector.
Position and Focus the Projector
Place the projector at the calculated distance and make sure the entire target surface falls inside the projected image.
Secure the projector before final mapping. Even a small movement after calibration can shift the image away from the mapped areas. HeavyM similarly emphasizes stable placement and correct focus before the mapping is finalized.
Map, Warp, and Mask the Projection
Use mapping software to define the areas of the physical surface that need to receive content.
You can create shapes that follow windows, corners, architectural details, or the contours of an object. Warping adjusts the visual output to match the surface, while masking prevents content from appearing where it should not.
This is where projection mapping differs most from simply playing a video through a projector: the content itself is prepared to match the geometry of the physical object.
Test Under Real Conditions
Always test the projection in the environment where it will actually be used.
Check focus, brightness, alignment, shadows, surface visibility, and the behavior of the content from the audience’s viewing position. An image that looks correct during a daylight setup or on a small preview may behave differently once the full surface and real lighting conditions are involved.
Common Projection Mapping Projector Buying Mistakes
Choosing a Projector by Lumens Alone
A high lumen rating does not automatically make a projector suitable for your installation. If its lens cannot cover the surface from the available distance, brightness alone will not solve the problem.
Ignoring Throw Distance
Buying a projector before measuring the installation area can leave you with the wrong lens range. Calculate the required throw ratio before comparing models.
Assuming 4K Is Always Necessary
Higher resolution has value, but it should be matched to viewing distance, image size, and content detail. Paying for extra resolution that the audience cannot meaningfully see is not always useful.
Relying Too Much on Keystone Correction
Keystone can correct geometry, but it should not replace proper positioning. Start with projector placement and optical controls, then use digital correction where appropriate.
Trusting Unclear or Non-Standard Lumen Claims
Compare standardized brightness specifications and read the projector’s detailed specifications rather than relying on a generic “high lumens” marketing claim.
Choosing a Projector Without Checking the Lens and Installation Requirements
Two projectors with similar resolution and brightness can require completely different mounting positions. Always check throw ratio, zoom range, lens shift, mounting options, orientation support, and any available lens choices before buying.
Projection Mapping Projector Buying Checklist
Before choosing a projector, work through these questions:
Surface: How large and complex is the projection area?
Distance: How far can the projector be placed from it?
Throw ratio: What lens range fits that distance and image width?
Ambient light: How bright will the environment be during projection?
Brightness: Is the projector’s standardized light output appropriate for the surface and conditions?
Resolution: Do you need 1080p or higher resolution based on image size and viewing distance?
Optics: Does it offer the lens shift, zoom, or lens options your installation requires?
Correction: Can you avoid relying on excessive keystone correction?
Light source: Does laser, LED, or lamp technology make the most sense for your usage?
Connectivity: Can it accept the signals your mapping computer or media server will provide?
Scale: Can one projector cover the entire surface, or will you need multiple units?
The most reliable way to choose a projection mapping projector is to work backward from the physical installation. Measure the surface, determine the available throw distance, calculate the required lens range, assess ambient light, and then compare brightness, resolution, and installation features.
Final Takeaway
The right projection mapping projector is not necessarily the brightest or most expensive one. Start with your surface size, available throw distance, ambient light, and viewing conditions, then choose the brightness, resolution, lens, and installation features that fit those requirements.
When the projector matches the physical setup, mapping becomes easier to align, more consistent to run, and better suited to the final result.
Frequently Asked Questions
Do you need a special projector for projection mapping?
No. There is no universal projector category that is required for mapping. A conventional projector can work when its brightness, resolution, lens, and placement capabilities match the project.
How many lumens does a projection mapping projector need?
There is no single correct number. Required brightness changes with projection area, ambient light, surface characteristics, and viewing conditions. A small dark-room installation and a large outdoor facade can have very different requirements.
Is 4K necessary for projection mapping?
Not always. 1080p can be sufficient for many small or medium projects. Higher resolution becomes more valuable when the projection is large, the audience is relatively close, or the content contains fine detail.
Is a short-throw projector better for projection mapping?
Not automatically. Short throw is useful when the projector must be positioned close to the surface. The correct choice depends on the required image width and available distance, which determine the necessary throw ratio.
Can I use a projector’s keystone correction for mapping?
You can, but it should not be your primary solution for major alignment problems. Proper placement and optical controls such as lens shift are preferable where available, with mapping software handling the final geometric adjustments.
Can one projector handle a large building?
Sometimes, but large architectural surfaces may require multiple projectors for adequate coverage and brightness. Multi-projector systems can use overlapping images and edge blending to create a continuous projection.
What is the most important specification for a mapping projector?
There is no single specification that matters in every project. The most important starting point is whether the projector’s lens, throw ratio, brightness, and resolution fit the physical setup. Choosing based on only one number can lead to a projector that looks impressive on paper but does not work well in the actual installation.
🔔 Follow Tech Statar for more insights like this!